Why Your Laravel App's Emails Land in Spam (and How to Fix It on Deploynix)
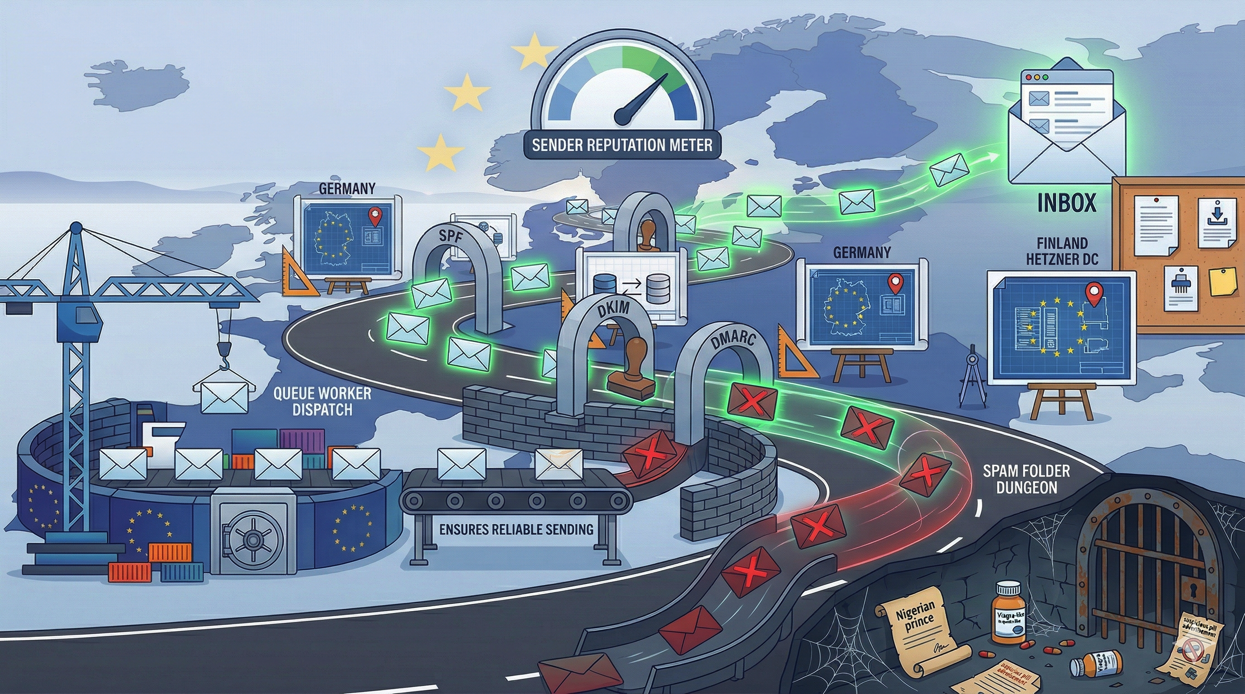
You spent an hour crafting the perfect welcome email. The copy is warm, the design is clean, and the call-to-action is compelling. A new user signs up for your Laravel application, your Mailable fires, the queue job processes successfully, and your logs confirm the email was sent. But the user never sees it. It is sitting in their spam folder, sandwiched between a Nigerian prince and a dubious pharmaceutical offer.
Email deliverability is one of those problems that is invisible until it is catastrophic. Your Laravel application can send emails perfectly from a technical standpoint, the SMTP transaction completes, the mail server accepts the message, and everything looks green in your logs. But email providers like Gmail, Outlook, and Yahoo make the final decision about where your message lands, and they are ruthlessly aggressive about filtering anything that looks remotely suspicious.
This guide explains why your emails are landing in spam and gives you concrete steps to fix it, with specific guidance for Laravel applications running on Deploynix-managed servers.
The Three Pillars of Email Authentication
Modern email deliverability rests on three authentication protocols that work together to prove you are who you say you are. If any of these are missing or misconfigured, email providers will treat your messages with suspicion. All three are DNS records, which means you need access to your domain's DNS management.
SPF (Sender Policy Framework)
SPF tells receiving mail servers which servers are authorized to send email on behalf of your domain. When Gmail receives an email claiming to be from notifications@yourapp.com, it checks the SPF record for yourapp.com to see if the sending server's IP address is authorized.
An SPF record is a TXT record on your domain that lists authorized senders. Here is what it looks like for common email providers:
# If using Postmark
v=spf1 include:spf.mtasv.net ~all

# If using Mailgun
v=spf1 include:mailgun.org ~all

# If using Amazon SES
v=spf1 include:amazonses.com ~all

# If using multiple providers
v=spf1 include:spf.mtasv.net include:mailgun.org ~all
The ~all at the end means "soft fail for anything not listed," which tells receivers to be suspicious of unauthorized senders but not outright reject them. Some guides recommend -all (hard fail), but ~all is generally safer while you are setting things up to avoid accidentally blocking legitimate mail.
Common mistake: If you are sending email directly from your Deploynix server using sendmail or a local SMTP server, your server's IP address needs to be in the SPF record. This is one of the many reasons we recommend using a dedicated email delivery service instead.
DKIM (DomainKeys Identified Mail)
DKIM adds a cryptographic signature to your outgoing emails that proves the message was actually sent by an authorized sender and was not modified in transit. The sending server signs the email with a private key, and the receiving server verifies the signature using a public key published in your DNS records.
Your email delivery provider generates the DKIM keys and gives you the DNS record to publish. The record looks something like this:
# DKIM record (type: TXT)
# Host: default._domainkey.yourapp.com
# Value: v=DKIM1; k=rsa; p=MIGfMA0GCSqGSIb3DQEB...
In Laravel, you do not interact with DKIM directly in your application code. It is handled at the mail server level. When you configure your Laravel application to send through Postmark, Mailgun, SES, or another provider, that provider handles DKIM signing automatically. Your responsibility is publishing the correct DKIM DNS record that the provider gives you.
Common mistake: DKIM records are often long and can get truncated if your DNS provider has character limits on TXT records. Some providers require you to split the record across multiple strings. Verify the full record is published correctly using a tool like dig TXT default._domainkey.yourapp.com.
DMARC (Domain-based Message Authentication, Reporting, and Conformance)
DMARC ties SPF and DKIM together and tells receiving servers what to do when authentication fails. It also provides a reporting mechanism so you can see who is sending email using your domain, whether legitimately or not.
A basic DMARC record looks like this:
# DMARC record (type: TXT)
# Host: _dmarc.yourapp.com
# Value: v=DMARC1; p=none; rua=mailto:dmarc@yourapp.com
The p=none policy means "monitor only." This is the right starting point. It tells receivers to deliver all messages regardless of authentication results but send you reports so you can see what is happening.
Once you have verified that your legitimate emails all pass SPF and DKIM, tighten the policy:
p=quarantinetells receivers to send failing messages to spam.p=rejecttells receivers to outright reject failing messages.
Moving from none to quarantine to reject should be a gradual process. Start with none, analyze the reports for a few weeks, fix any authentication issues, then move to quarantine, and eventually reject.
Common mistake: Setting p=reject immediately without monitoring first. If there is a service you forgot about that sends email using your domain (a CRM, a helpdesk, a marketing automation tool), p=reject will cause all of its emails to bounce.
Reverse DNS (PTR Records)
Reverse DNS maps an IP address back to a hostname. When a mail server receives a connection, it performs a reverse DNS lookup on the connecting IP to verify that the IP address resolves back to a legitimate hostname. If reverse DNS is not configured or resolves to a generic hostname like 123.456.789.0.generic.provider.com, that is a spam signal.
For emails sent through a dedicated email delivery service (Postmark, Mailgun, SES), the provider handles reverse DNS for their own servers. You do not need to configure anything.
However, if you are sending email directly from your Deploynix-managed server, reverse DNS matters. Deploynix provisions servers on cloud providers like DigitalOcean, Vultr, Hetzner, Linode, and AWS. Each provider has a different process for setting PTR records:
DigitalOcean: PTR is automatically set to the Droplet's name. Name your server with your domain (e.g.,
mail.yourapp.com).Vultr: Configure PTR through the Vultr control panel under the server's settings.
Hetzner: Configure PTR through the Hetzner Cloud Console or API.
Linode: PTR is set through the Linode Manager's networking section.
AWS: Request a PTR record through AWS support for EC2 instances.
But here is the real advice: do not send email directly from your application server. Use a dedicated email delivery service. The rest of this guide assumes you will follow that advice.
Why You Should Not Send Email from Your Server
It is technically possible to configure Postfix or another MTA on your Deploynix-managed server and send email directly. Laravel supports this through the sendmail mail driver. Do not do this unless you have a very specific reason and understand the implications.
Sending email from a cloud server IP address is fighting an uphill battle. Cloud provider IP ranges are well-known to email providers, and many of those IPs have been used to send spam at some point. Even if your specific IP is clean, it may share a reputation with neighboring IPs in the same subnet.
Dedicated email delivery services solve this problem by:
Maintaining IP pools with carefully managed reputations.
Handling SPF, DKIM, and DMARC configuration for you.
Providing deliverability analytics so you can monitor inbox placement.
Managing bounce handling, complaint processing, and suppression lists.
Offering dedicated IP addresses if your volume justifies it.
For Laravel applications, the best options are Postmark (excellent for transactional email, the highest deliverability rates in the industry), Mailgun (good for both transactional and bulk email), and Amazon SES (lowest cost at scale, more setup required).
Configuring Laravel for Email Delivery
In your Laravel application, email configuration lives in config/mail.php. Set your default mailer to your chosen email provider and configure the credentials in your environment variables. Here is an example using Postmark:
// .env on your Deploynix server
MAIL_MAILER=postmark
POSTMARK_TOKEN=your-postmark-server-token
MAIL_FROM_ADDRESS=notifications@yourapp.com
MAIL_FROM_NAME="Your App Name"
The MAIL_FROM_ADDRESS should use your own domain, not a freemail address like Gmail. Sending application emails from a Gmail address is a strong spam signal and also means you cannot properly configure SPF, DKIM, and DMARC.
On your Deploynix server, set these environment variables through the Deploynix dashboard. Environment variables are stored securely and injected into your application's .env file during deployment.
Queue Your Emails
Always send emails through a queue in production. Sending email synchronously blocks the HTTP request while waiting for the SMTP transaction to complete, which can take several seconds. More importantly, if the email provider is temporarily unavailable, the request fails entirely.
Laravel makes this trivial:
// In your controller or service
Mail::to($user)->queue(new WelcomeEmail($user));

// Or implement ShouldQueue on the Mailable itself
class WelcomeEmail extends Mailable implements ShouldQueue
{
    // ...
}
On Deploynix, your queued emails are processed by your dedicated worker servers. This means email sending does not consume resources on your app servers, and if the email provider has a momentary hiccup, the queue automatically retries the job.
Content and Sending Practices
Authentication is necessary but not sufficient. The content and patterns of your emails also affect deliverability.
Avoid Spam Triggers
Email providers use content analysis alongside authentication checks. Avoid these common triggers:
ALL CAPS in subject lines. It looks like shouting.
Excessive exclamation marks. One is fine. Three is spam.
Spammy phrases. "Act now," "limited time," "free money." These are weighted negatively by spam filters.
Image-only emails. Emails that are just one large image with no text are a classic spam pattern. Always include meaningful text content.
Misleading subject lines. The subject should accurately describe the email content. "Re:" on a non-reply email is deceptive.
Send Consistently
Email providers track your sending patterns. If you normally send 100 emails per day and suddenly send 10,000, that spike looks suspicious. When launching a new feature that generates emails, ramp up gradually.
Honor Unsubscribes Immediately
When a user unsubscribes, stop sending them emails immediately. Do not wait for the next batch processing cycle. Do not send a "we are sorry to see you go" email. Just stop. Laravel's notification system supports checking notification preferences, so implement an unsubscribed check in your notification classes.
Monitor Bounce Rates
A high bounce rate (sending to invalid email addresses) damages your sender reputation rapidly. Implement email verification during registration, handle hard bounces by disabling the email address, and periodically clean your user list.
Most email delivery services provide webhook callbacks for bounce events. Configure a webhook endpoint in your Laravel application that listens for bounce notifications and automatically marks the email address as invalid.
Testing Email Deliverability
Before declaring victory, test your email setup thoroughly.
Mail Tester (mail-tester.com): Send an email from your application to the unique address provided by Mail Tester. It will analyze your message and give you a score out of 10, with specific feedback on what to fix. Aim for a score of 9 or above.
MXToolbox: Check your domain's DNS records including SPF, DKIM, and DMARC. It identifies common misconfigurations and provides actionable recommendations.
Google Postmaster Tools: If a significant portion of your users are on Gmail, register your domain with Google Postmaster Tools. It provides data on your domain's reputation, spam rate, authentication success rate, and delivery errors.
Send to Multiple Providers: Test by sending emails to Gmail, Outlook, Yahoo, and iCloud accounts. Deliverability can vary between providers, so passing spam filters on one does not guarantee passing on another.
The Complete DNS Checklist
Here is a summary of every DNS record you need for reliable email deliverability:
SPF Record: TXT record on your root domain listing all authorized senders.
DKIM Record: TXT record (usually on a subdomain like
default._domainkey) containing your public key.DMARC Record: TXT record on
_dmarc.yourdomain.comspecifying your policy and report address.MX Records: If you also receive email on your domain, proper MX records are essential.
PTR Record: Only relevant if sending directly from your server (which you should not be doing).
Verify all records are published correctly, then test using the tools mentioned above. DNS changes can take up to 48 hours to propagate, but usually take effect within an hour.
Moving Forward
Email deliverability is not a set-it-and-forget-it task. Monitor your delivery rates, watch for reputation drops, respond to bounces and complaints promptly, and review your DMARC reports periodically.
On Deploynix, your server infrastructure handles the operational side: environment variables for mail credentials, queue workers for reliable delivery, and the overall server performance that ensures emails are sent promptly. But the email authentication records and content practices are your responsibility.
Get SPF, DKIM, and DMARC configured correctly. Use a dedicated email delivery service. Queue your emails. Monitor your metrics. Your carefully crafted welcome email deserves to land in the inbox, not the spam folder.