Deploying a Laravel SaaS with Paddle Billing: Complete Integration Guide
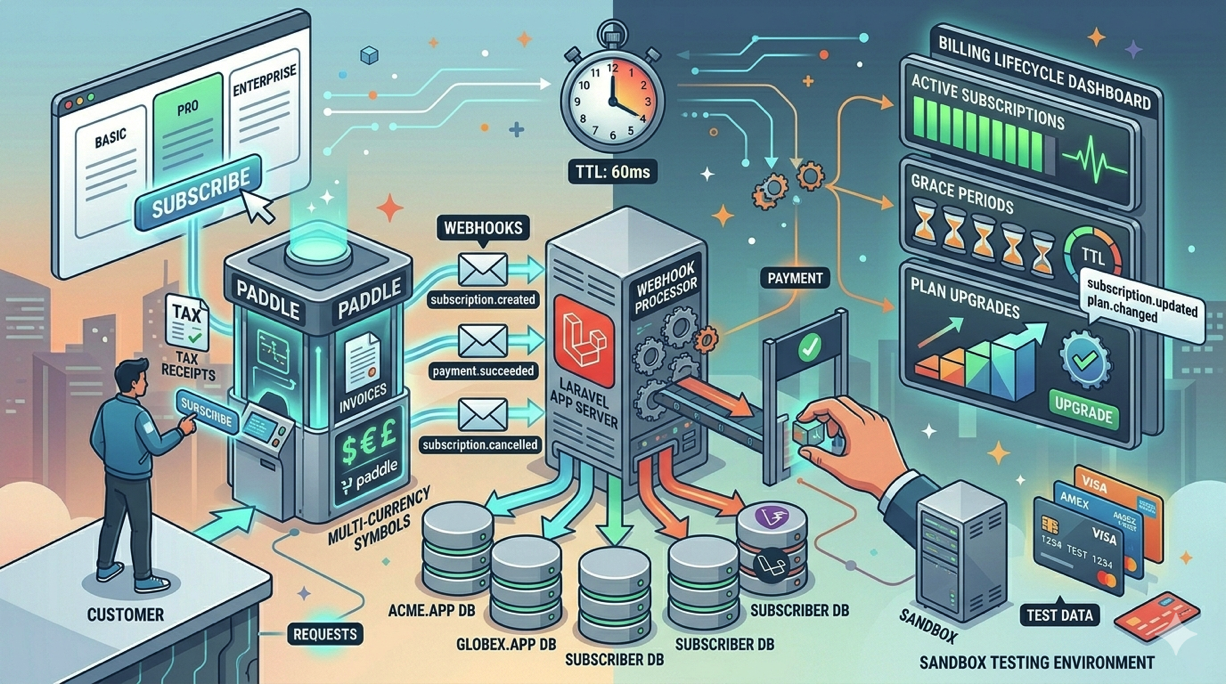
Building a SaaS application is hard enough without wrestling with payment infrastructure. Paddle has become the go-to billing provider for Laravel developers because it acts as a Merchant of Record, handling tax compliance, invoicing, and payment processing so you can focus on building your product. Laravel Cashier Paddle makes the integration seamless on the code side. But getting everything properly configured and deployed to production is where many developers stumble.
This guide walks you through the complete process of integrating Paddle billing into a Laravel application and deploying it on Deploynix, from initial Paddle setup through webhook configuration, subscription lifecycle management, and sandbox testing.
Why Paddle for Laravel SaaS Applications
Before diving into the technical setup, it is worth understanding why Paddle pairs so well with Laravel applications deployed on Deploynix.
Paddle operates as a Merchant of Record, meaning Paddle is the legal seller of your software. This eliminates the need for you to handle sales tax, VAT, and other tax compliance headaches across different jurisdictions. For a solo founder or small team launching a SaaS, this removes an enormous operational burden.
Laravel Cashier Paddle provides an expressive, fluent interface to Paddle's subscription billing services. It handles subscription creation, swapping plans, cancellation, grace periods, and invoice generation out of the box.
Deploynix itself uses Paddle for its billing infrastructure across its Free, Starter, Professional, and Enterprise tiers, so the platform is built with a deep understanding of how Paddle-powered applications need to operate.
Setting Up Your Paddle Account
Start by creating a Paddle account at paddle.com. Paddle offers a sandbox environment that mirrors production, and you should do all your initial development and testing there.
Once your account is created, you need to gather several credentials:
Vendor ID — Found in your Paddle dashboard under Developer Tools
API Key — Generate one in Developer Tools with appropriate permissions
Client-Side Token — Used for Paddle.js on the frontend
Webhook Secret — Generated when you set up your webhook endpoint
Create your subscription products and prices in the Paddle dashboard. For a typical SaaS, you might create:
A "Starter" product with monthly and yearly prices
A "Professional" product with monthly and yearly prices
An "Enterprise" product with monthly and yearly prices
Note down the price IDs for each. You will need them in your Laravel configuration.
Installing and Configuring Laravel Cashier Paddle
Install the Cashier Paddle package:
composer require laravel/cashier-paddlePublish the configuration and migrations:
php artisan vendor:publish --tag="cashier-migrations"
php artisan vendor:publish --tag="cashier-config"
Run the migrations to create the necessary billing tables:
php artisan migrateAdd the Billable trait to your User model or whichever model represents your billable entity:
use Laravel\Paddle\Billable;

class User extends Authenticatable
{
    use Billable;
}
Environment Configuration
This is where careful configuration matters, especially when deploying through Deploynix. You need to set different environment variables for your sandbox and production environments.
For your sandbox environment:
PADDLE_SANDBOX=true
PADDLE_SELLER_ID=your-sandbox-seller-id
PADDLE_API_KEY=your-sandbox-api-key
PADDLE_CLIENT_SIDE_TOKEN=your-sandbox-client-token
PADDLE_WEBHOOK_SECRET=your-sandbox-webhook-secret
For production:
PADDLE_SANDBOX=false
PADDLE_SELLER_ID=your-production-seller-id
PADDLE_API_KEY=your-production-api-key
PADDLE_CLIENT_SIDE_TOKEN=your-production-client-token
PADDLE_WEBHOOK_SECRET=your-production-webhook-secret
In your Deploynix dashboard, navigate to your site's environment variables section and add these values. Deploynix stores environment variables securely and injects them into your application during deployment. Never commit these values to your repository.
Remember the Laravel convention: use env() only in configuration files, not directly in application code. Your config/cashier.php file handles pulling these from the environment, and your application code should reference config('cashier.seller_id') and so on.
Setting Up Webhook Endpoints
Webhooks are the backbone of Paddle integration. Paddle sends webhook events to your application whenever something happens: a subscription is created, a payment succeeds, a payment fails, a subscription is cancelled. Your application must be able to receive and process these events.
Laravel Cashier Paddle automatically registers a webhook route at /paddle/webhook. You need to ensure this route is accessible and properly configured.
First, tell Paddle where to send webhooks. In your Paddle dashboard, add a webhook endpoint pointing to:
https://your-app.com/paddle/webhookMake sure this URL uses HTTPS. Deploynix automatically provisions SSL certificates for your sites, so this should already be the case. Deploynix supports SSL auto-provisioning through DNS providers including Cloudflare, DigitalOcean, AWS Route 53, and Vultr.
In your Laravel application, exclude the webhook route from CSRF verification. Laravel Cashier typically handles this automatically, but verify that the webhook route is listed in your middleware configuration.
Webhook Security
Paddle signs every webhook request with a secret. Laravel Cashier verifies this signature automatically using the PADDLE_WEBHOOK_SECRET environment variable. This prevents malicious actors from sending fake webhook events to your application.
If webhook signature verification fails, Cashier will return a 403 response and log the failure. Check your Laravel logs if webhooks are not being processed.
Implementing the Subscription Lifecycle
With the infrastructure in place, let's walk through the complete subscription lifecycle.
Creating Subscriptions
Use Paddle's checkout overlay to create new subscriptions. In your Blade template:
<x-paddle-button :checkout="$checkout" class="btn btn-primary">
    Subscribe Now
</x-paddle-button>
Generate the checkout in your controller:
public function showPricing(Request $request): View
{
    $checkout = $request->user()->checkout('pri_monthly_starter')
        ->returnTo(route('dashboard'));

    return view('pricing', ['checkout' => $checkout]);
}
Handling Subscription Events
Cashier dispatches Laravel events for key subscription lifecycle moments. Listen for these in your application to perform side effects:
use Laravel\Paddle\Events\SubscriptionCreated;
use Laravel\Paddle\Events\SubscriptionUpdated;
use Laravel\Paddle\Events\SubscriptionCanceled;

class EventServiceProvider extends ServiceProvider
{
    protected $listen = [
        SubscriptionCreated::class => [
            ProvisionUserResources::class,
        ],
        SubscriptionCanceled::class => [
            HandleCancellation::class,
        ],
    ];
}
Checking Subscription Status
Throughout your application, you will need to check what plan a user is on and whether their subscription is active:
// Check if the user has any active subscription
if ($user->subscribed()) {
    // User has an active subscription
}

// Check specific subscription status
if ($user->subscription()?->onGracePeriod()) {
    // User cancelled but subscription hasn't expired yet
}

// Check specific price/plan
if ($user->subscribedToPrice('pri_professional_monthly')) {
    // User is on the Professional monthly plan
}
Swapping Plans
When a user upgrades or downgrades their plan:
$user->subscription()->swap('pri_professional_monthly');Paddle handles proration automatically. If a user upgrades mid-cycle, they are charged the prorated difference. If they downgrade, they receive a credit.
Cancellation and Grace Periods
When a user cancels, they typically retain access until the end of their current billing period:
$user->subscription()->cancel();

// The user can still access premium features
if ($user->subscription()->onGracePeriod()) {
    // Show "Your subscription will end on {date}" message
}
Deploying to Production on Deploynix
With your Paddle integration built and tested locally, it is time to deploy to production.
Pre-Deployment Checklist
Switch Paddle credentials. Ensure your production Deploynix environment variables use your live Paddle credentials, not sandbox ones. Double-check that
PADDLE_SANDBOXis set tofalse.
Verify webhook URL. Update your Paddle dashboard webhook endpoint to point to your production domain.
Run migrations. Deploynix runs your migrations as part of the deployment process if you configure it in your deploy script. Add
php artisan migrate --forceto your deploy script.
Set up your queue worker. Webhook processing benefits from being queued. If you are using queued event listeners, make sure you have a worker server or daemon configured in Deploynix. Deploynix supports dedicated Worker server types specifically for this purpose.
Deployment Configuration
In your Deploynix site settings, configure your deploy script:
Build steps:
composer install --no-dev --optimize-autoloader
npm ci && npm run build
Activation steps:
php artisan migrate --force
php artisan config:cache
php artisan route:cache
php artisan view:cache
Deploynix performs zero-downtime deployments by default, meaning your existing site continues serving traffic while the new release is being prepared. The switch happens atomically, so users never see a partially deployed state.
Testing Webhooks in Production
After your first production deployment, verify that webhooks are flowing correctly:
Create a test subscription using a real payment method (you can cancel it immediately).
Check your Paddle dashboard for the webhook delivery status. Paddle shows whether each webhook was delivered successfully or failed.
Check your Laravel logs for any webhook processing errors.
Verify that the subscription appears in your database.
If webhooks are failing, common causes include:
SSL certificate issues. Paddle requires a valid SSL certificate. Deploynix handles this automatically, but verify your certificate is active.
Firewall rules. Ensure your Deploynix firewall rules allow incoming HTTPS traffic from Paddle's IP ranges.
Application errors. Check your Laravel logs for exceptions during webhook processing.
Sandbox Testing Strategy
Before going live, thoroughly test your billing flows in Paddle's sandbox environment. Set up a separate staging server on Deploynix with sandbox credentials.
Paddle's sandbox provides test card numbers and simulates the complete billing lifecycle without real charges. Test these scenarios:
New subscription creation across all plan tiers
Plan upgrades and downgrades with proration verification
Cancellation and grace period behavior
Failed payment recovery where Paddle retries and notifies
Subscription resumption after cancellation during grace period
Webhook replay to ensure idempotent processing
Deploynix makes it easy to maintain separate staging and production environments. Provision a separate app server for staging, configure it with sandbox credentials, and deploy to it before promoting changes to production.
Handling Edge Cases
Real-world billing has many edge cases. Here are the ones that catch most developers:
Webhook ordering. Paddle may deliver webhooks out of order. Your application should handle receiving a subscription.updated event before a subscription.created event. Cashier handles most of these cases, but custom event listeners should be defensive.
Duplicate webhooks. Paddle may send the same webhook multiple times. Your processing should be idempotent, meaning processing the same event twice should produce the same result as processing it once.
Currency handling. Paddle handles multi-currency pricing. Store amounts as integers (cents) in your database to avoid floating-point precision issues.
Failed payments. When a payment fails, Paddle will retry automatically and send webhook notifications. Your application should gracefully degrade features rather than immediately locking users out.
Monitoring Your Billing in Production
Once live, keep an eye on your billing health:
Monitor webhook delivery success rates in the Paddle dashboard
Set up alerts for failed payments in your application
Track subscription churn and upgrade rates
Review your Laravel logs regularly for billing-related errors
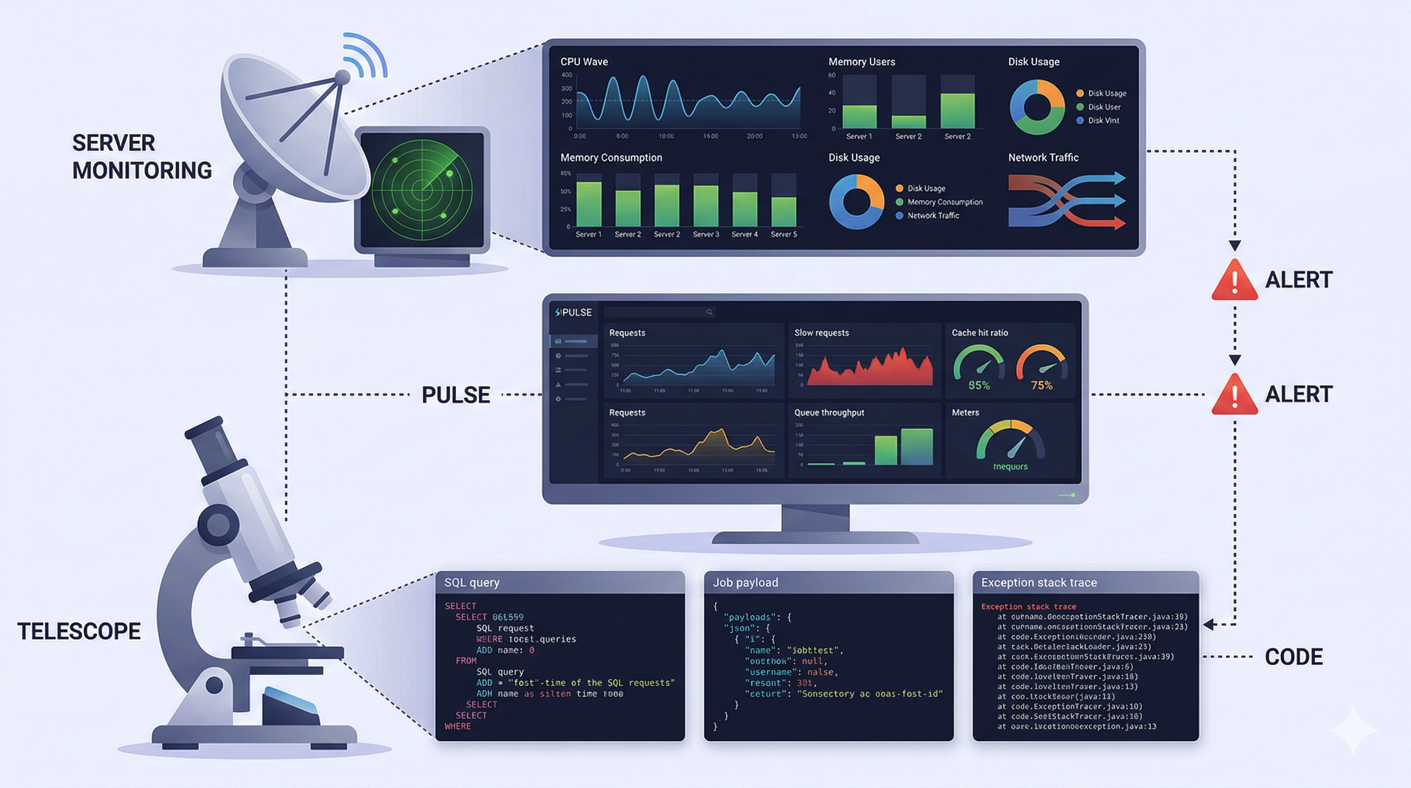
Deploynix's real-time monitoring helps you keep an eye on server health, which indirectly affects billing reliability. If your server is down, webhooks will fail and subscriptions will not be properly provisioned.
Conclusion
Deploying a Laravel SaaS with Paddle billing on Deploynix gives you a robust, production-ready billing infrastructure with minimal operational overhead. Paddle handles tax compliance and payment processing, Laravel Cashier provides an elegant API for subscription management, and Deploynix ensures your application is deployed reliably with zero-downtime deployments, automated SSL, and proper server configuration.
The key to a smooth billing integration is thorough testing in sandbox, careful environment configuration, and proper webhook handling. Take the time to test every billing scenario before going live, and you will save yourself countless support tickets and revenue leakage down the road. With everything wired up correctly, you can focus on what matters most: building a product your customers love and will happily pay for.